Remove V9 portal: how to uninstall v9.com virus
What makes the V9 browser helper object an unwanted program is its purely malicious mode of operation based on utmost disrespect for user authorization to amend a number of Internet-related preferences.
The web page of v9.com whose screenshot is provided below may seem relatively fine at first sight, but that’s just the tip of the iceberg as far as this entire adware crusade is concerned. To begin with, it serves both as a traffic giveaway portal pointing to a third-party search provider and as a system with native online search functionality. Seems comparatively okay so far, doesn’t it? The bad part has to do with the all-around endorsement of sponsored links and advertisement banners on there. What’s yet worse is the path through which users end up on the v9 landing page.

This online redirect activity stems from the modifications made by the browser extension in question or an affiliated add-on. Again, in terms of v9 virus this routine unfortunately doesn’t need user approval, although it should. As a result, the web browser homepage URL gets automatically replaced with v9.com, en.v9.com or safe.v9.com, and the preferred search engine accessible from the built-in box in the browser tools panel turns into search.v9.com. To top it off, the bug alters shortcut configuration, triggering the diverts when random programs are being launched. These settings are no longer up to the user, which is immensely annoying.
Most of the affected users are puzzled with how the v9 extension got on their PCs as they never installed it. Well, when you’re dealing with adware the infiltration process gets intricate – the payload mostly gets dropped when some other software is being installed. For v9, the known medium apps are New Tabs Uninstall, SupTab, IePluginService, Desk 365, eSafe Security Control; there are definitely more as the campaign is rolling forward.
From a user’s standpoint, there is no option regarding the v9 threat other than removal. This adware will not disappear on its own until you make it leave your system. The rest of this tutorial is at your disposal to help you out with the cleanup task.
v9.com removal with automatic cleanup tool
An optimal workflow for eliminating the v9 virus is to leverage a security application which will identify all potentially malicious software on your computer and handle it the right way. This approach ensures thoroughness of the removal and system remediation, and allows avoiding unintended damage that might occur as a result of manual malware deletion.
1. Download and install v9.com removal software. Launch it and click the Start New Scan button. Wait for the application to check your computer for threats

Download v9.com remover
2. When the app is done scanning your system, it will come up with an extensive list of detected objects. Click the Fix Threats option to have the utility completely remove v9.com and affiliated infections found on your PC.
Uninstall troublemaking software through Control Panel
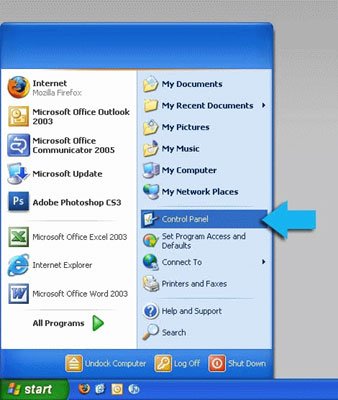
– Go to Start menu and select Control Panel on the list
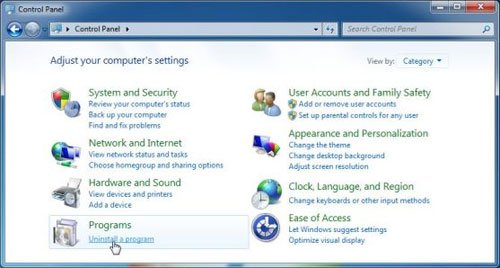
– Click on the Uninstall a program (Add or Remove Programs) button
– Take a good look at the software list displayed. Search for an application installed recently and prior to v9.com issues. It’s typically free Flash-related software, file format converters, media apps and the like. When found, the probable culprit should be uninstalled
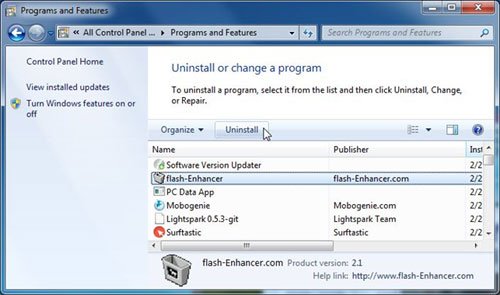
– Unfortunately, it’s not easy to figure out which program is associated with v9.com virus in your case. If you are unsure, stick to the automatic cleanup advice or try the browser reset option described below.
Remove v9.com virus by resetting the affected browser
FYI: This procedure will lead to the loss of custom browser settings, including bookmarks, cookies, passwords saved, and all browsing history. Please keep this in mind when making a decision to proceed.
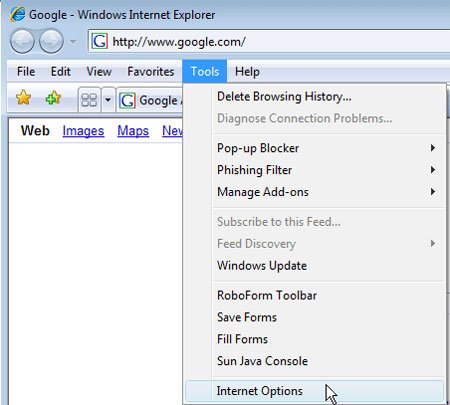
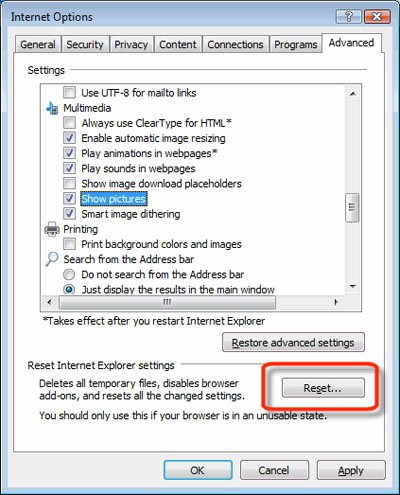
Reset Internet Explorer to its defaults
– Go to Tools –> Internet Options
– Select the Advanced tab as shown below and click the Reset button
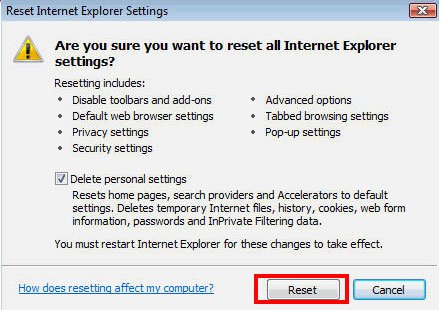
– Read the warning about the effects of resetting IE. If you are sure, proceed by checking the Delete personal settings option and clicking Reset
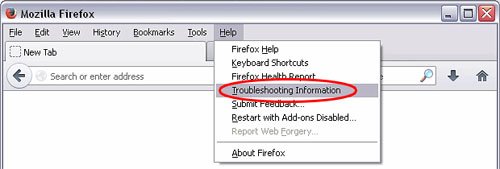
Reset Mozilla Firefox
– Go to Help – Troubleshooting Information
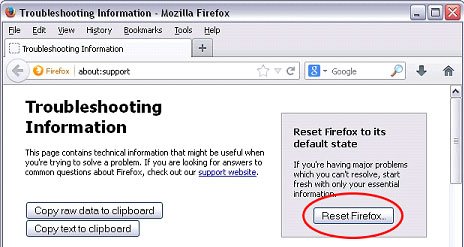
– Firefox will come up with the Troubleshooting Information screen. Click the Reset Firefox button to complete the process
Reset Google Chrome
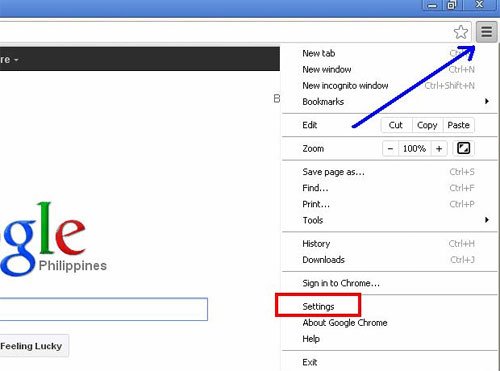
– Go to the Chrome Menu icon and pick Settings on the list
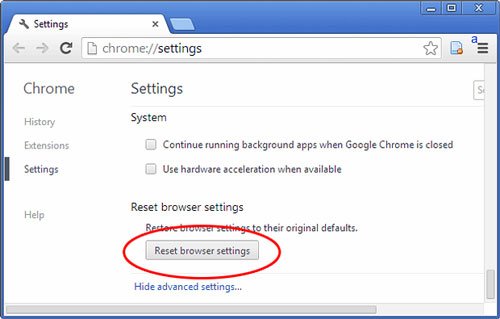
– Click on the Show advanced settings button

– Click on the button reading Reset browser settings
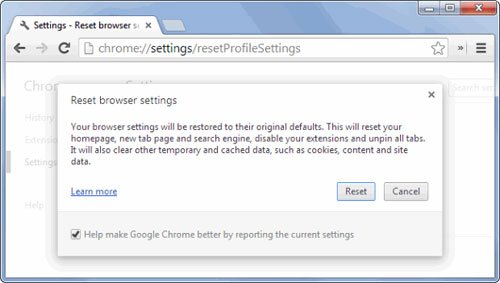
– On the notification box that pops up, review the consequences of Chrome reset and click Reset if it’s ok with you
Double-checking never hurts
To make sure the v9 hijacker has been removed, consider running an additional security scan as a completion of the cleanup procedure
Download and install v9.com removal software
Sir
I tried the instruction via your web site for delete V9 , however having clicked reset browser settings it still was installed.
Downloaded removal software and hope that works.
Appreciate your help very useful
Thanks
The best of luck cleaning your system from this adware, Robert!
I had V9 problem, could’t remove it for many days, even I’ve paid to help, still did not work。 yesterday,I try your” Reset Google Chrome” step by step. and it works imminently . I Appreciate your help very much。You do the excellent job.
Thank you su much! I use what it used to be my dad’s laptop, and I have cleaning it and improving it for months! And I couldn’t get ride of the v9 virus. It was the desk 365 program! Best website ever <3